RSVP Pro - Support for payments and Guests.
This new version (1.9.x) of the Attendance, Invitations and Reminders add-on (aka RSVP Pro) adds the ability to charge for attendance and to add guest registrations. The 1.9.x version current supports Joomla! versions 1.5.25, 1.6.6, 1.7.x, 2.5.x.
These notes provide instructions on installation and setup.
1. Pre-installation
- Make sure you have JEvents 1.5.6+ or JEvents 2.0+ installed.
- For Joomla 1.5 make sure you have Virtuemart 1.1.6+ installed and configured (if you wish to use Virtuemart as a payment gateway).
- For Joomla 1.5 make sure that the Mootools system upgrade plugin is enabled.
- For Joomla 1.5, you must use JEvents 1.5.5g+ in order for RSVP Pro to function correctly.
2. Installation of RSVP Pro
- Start with RSVP Pro plugin – install and enable the plugin
- Install the RSVP Pro component – YOU MUST OPEN THIS COMPONENT AND OPEN AND SAVE THE CONFIGURATION IN THE BACKEND OF JOOMLA TO COMPLETE THE INSTALLATION PROCESS.
- Add RSVP Pro to the Event Details page, go to Jevents in the Administration Back-end, then Layout Defaults. Enabled the Event Detail page by click the round icon to the right, once it is enabled it will be a round green icon like so: now, select the Event Detail page. Now this has loaded select the position you want the RSVP Pro attendance form to be displayed, once you have done that use the drop down on the right hand side and select Attendance/Invidiations/Reminds. That will then load the required code, so click save.
- Install and configure the payment plugins you require – see next section.
- Install and enable the Article/Event linkage content plugin from
http://www.jevents.net/en/downloads/category/12-agenda-minutes-article-links - If using Virtuemart in Joomla 1.5:
6.1. - Enable content plugins in Virtuemart – see Frontend Features in global configuration of VM
6.2. - Click the 'Apply Virtuemart Modifications' button in the control panel of RSVP Pro in the backend of Joomla. This will make a few modifications to a couple of VM files to allow variable priced products and the option to skip shipping.
3. Configuration of RSVP Pro Component
There are several tabs of configuration options in the RSVP Pro configuration. Taking these in turn:
3.1 Attendance Options
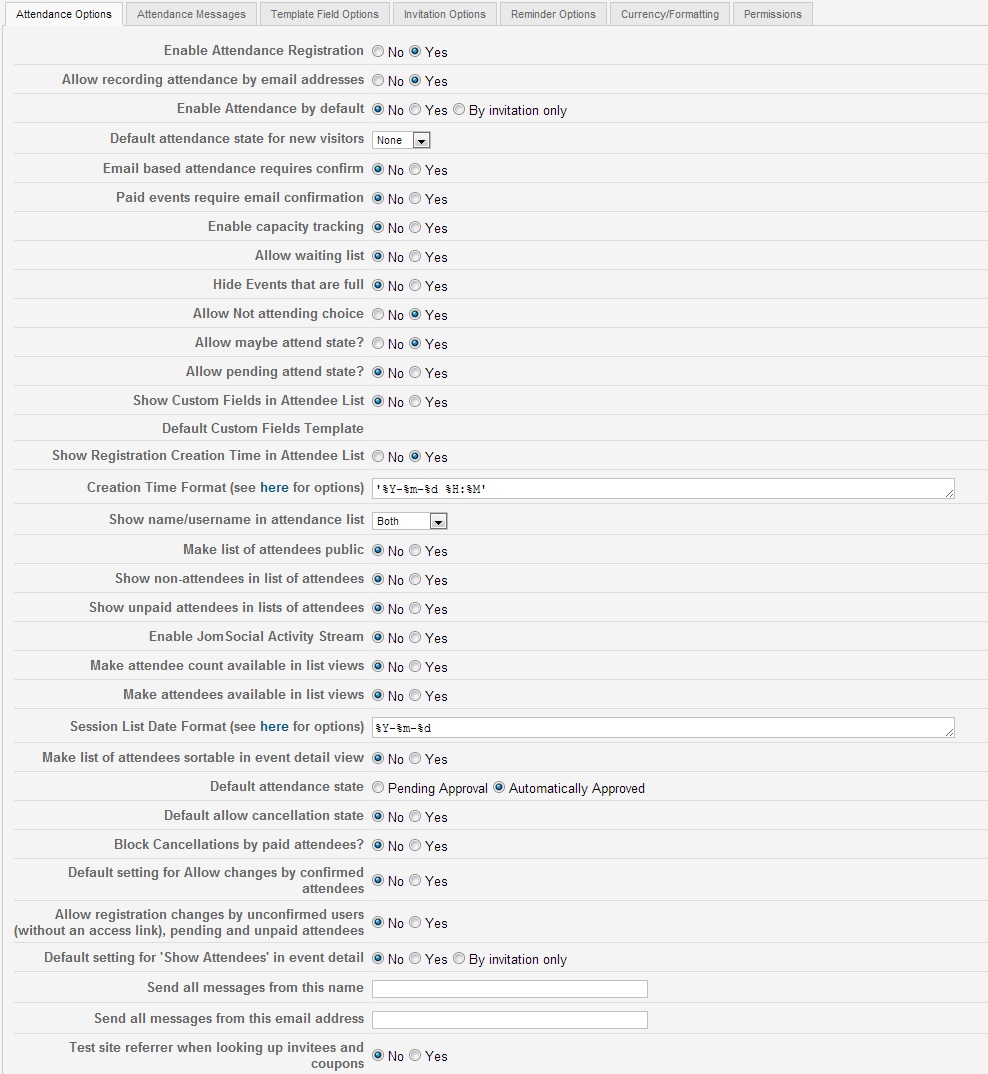
These settings control the attendance part of the RSVP Pro add-on. Most of these are self explanatory. The more complicated ones are explained below:
Default Custom Fields Template - This is blank in the above image, a select list will appear allowing you to select a Default Registration Template when creating events once you have created a Shared Global RSVP Pro Registration Template.
3.2. Attendance Messages
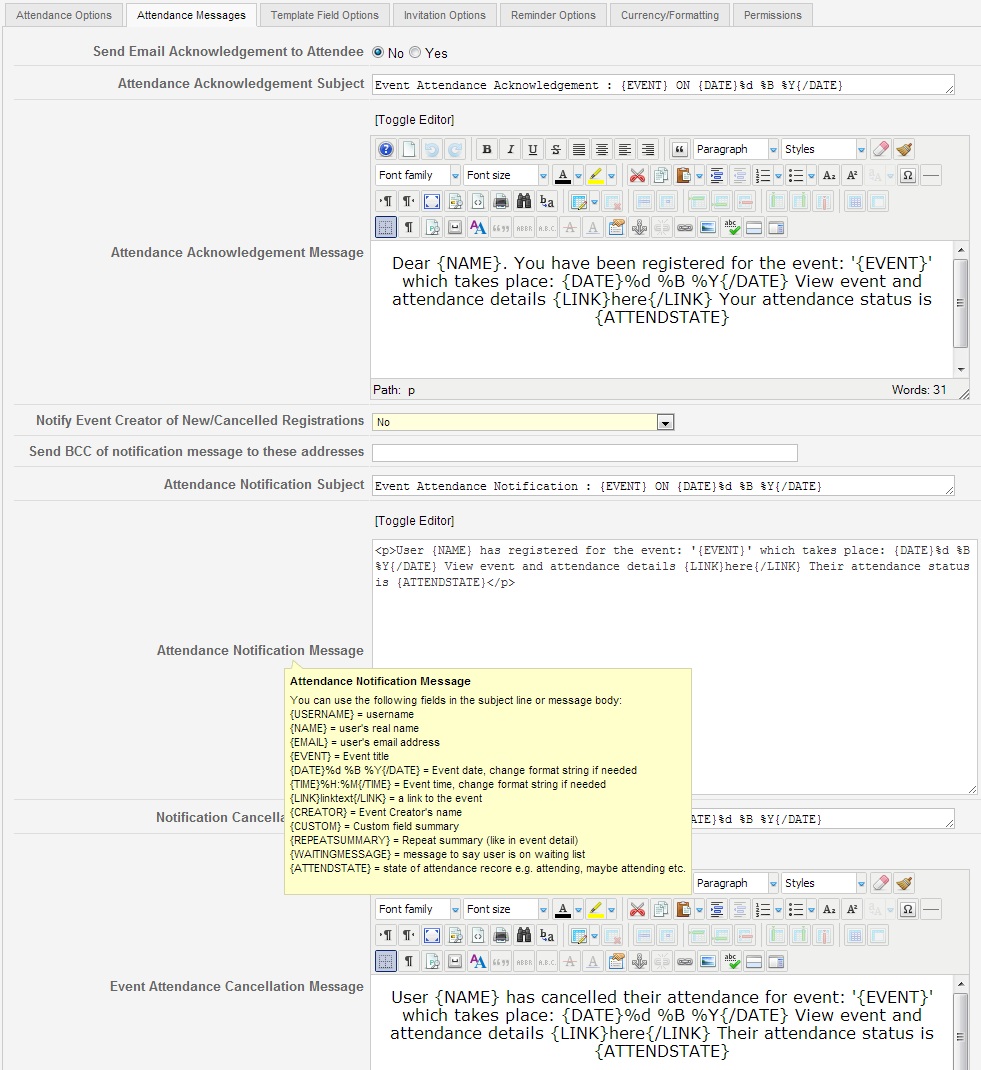
You can change the default messages that are sent to the event organiser or attendees on this tab.
To see a list of fields that can be used simply hover the mouse of the title of the field and you will see a pop-up with the fields that can be used.
You can now customise what type of alterations user make to their Registrations with the option - Notify Event Creators or New/Cancelled Registrations see:

You will see the above field at the very bottom of the attendance messages tab. This allows emails to be Blind Copied to a specific Community Builder Field which holds an email address. Just enter the field name here.

3.3. Template Field Options
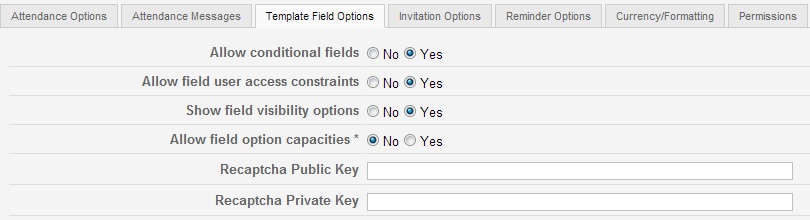
The template field options, allow fine tuning what is offered to users.
Allow conditional fields - This controls where you can show fields based on a boolean condition.
Allow field user access constraints - This controls what Joomla Access Levels the field / fields are shown to.
Show field visibility options - Allows controlling where the field will be displayed, in list? editing event etc. See below for explanation:
- Only Visible in form - Will only show the field when filling out the Registration Form
- Show in form - Will show this field in the form when filling out the Registration Form
- Show in detail - Will show the field in the event detail, once the registration is confirm.
- Show in list - Shows the field in the Attendee List, when it is shown to either Admins or Public.
Allow field option capactities - If using capacity tracking for events, this allows you to control if individual fields have option capacities.
Recaptcha:-
We have implement the Google Recaptcha to help prevent spam. To use this you will need to go to:
http://www.google.com/recaptcha
And sign up, it is completely free and very effective. Once signed up you will be provided with your Public and Private Keys, just copy and paste them here.
3.4. Invitation Options
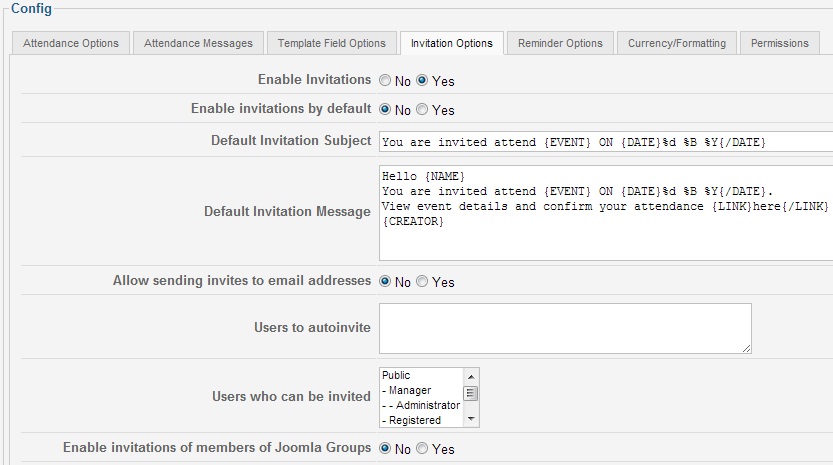
The invitation options are controlled on this tab. Note that you can auto invite a list of users to all of your events by adding their ids or name/email addresses. e.g.
43,67,fred(
You now also have the option of selecting multiple user groups to invite. To select more than one group hold the 'Ctrl' key whilst using your mouse to select the other groups.
NOTE:- That you must select each single group you want to be able to invite. This does not function hirearical.
3.5. Reminder Options
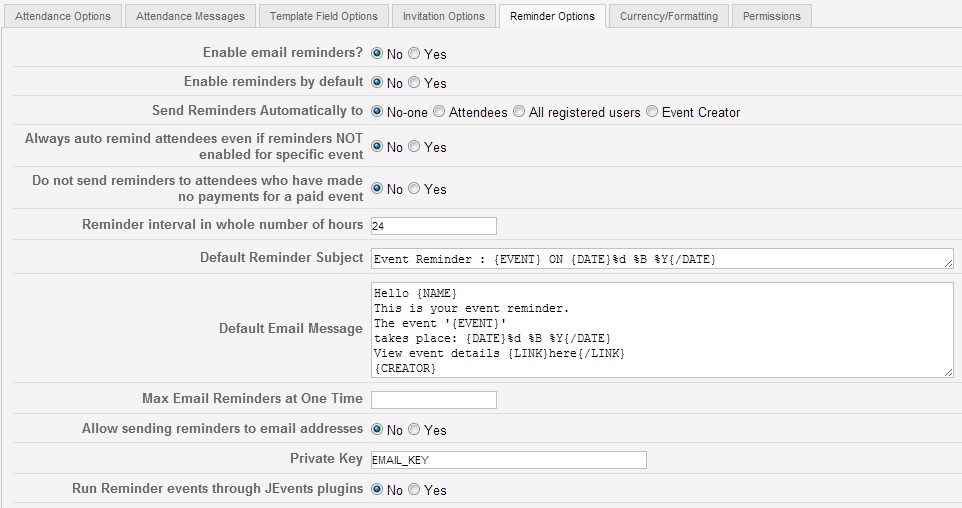
The options for reminders are controlled on this tab. You can setup auto reminders for attendees and control how soon before the event starts that the reminders are sent.
Note that to avoid overloading the server you can limit the number of email reminders that are sent in a single batch. Furthermore your host may have a limit for the amount of emails you can send within a set time period, it might be worth checking this first.
The private key is used to encrypt links sent to email address based attendees, invitees and remindees so that the privacy of their attendance or invitation is preserved. Replace this with some text that is not likely to be identified by a possible snooper.
3.6. Currency/Formatting
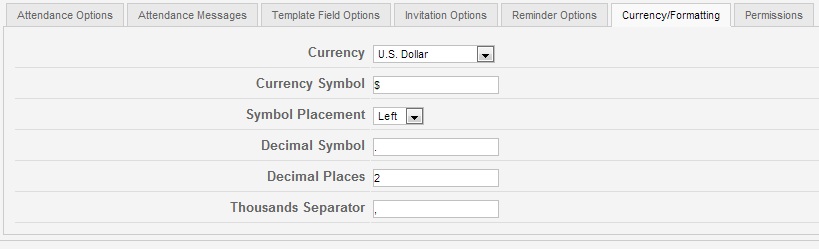
This controls the default currency and currency formatting used in the addon.
It can be over-ridden in the event template to allow configuring of events individually.
3.7. Permissions

This is how you control who can create registrations and custom field templates.
4. Virtuemart Options and Configuration
The first time a site visitor pays for an event with Virtuemart a new product type is created in VM with a special SKU => RSVP_xxx_yyy where xxx is the event id and yyy is the repeat id (0 in the case of non-repeating events). The title and description in the product will match the event and the description will include a special code that will cause any person viewing the product in virtuemart to be redirected to the event registration page.
The SKU prefix can be changed in the Plugins Parameters see: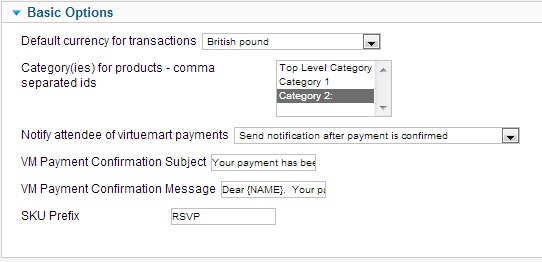
Just replace RSVP in the SKU Prefix to have your own prefix.
4.1 Configuring the virtuemart payment plugin
1. Select the default Currency for transactions.
2. Create a category for your event tickets (using this you can customise the flypage if you wish). Then select the new category your created for RSVP Pro.
3. Notify attendee of virtuemart payments -
3.1. No - Do not notify the Attende of virtuemart payments
3.2. Send notification after payment is confirmed
3.3 Send notifications / Invoice immediately after registration.
4. If you want to ship physical tickets then you need to do nothing else but if you want to skip the shipping step of the checkout process then you must create a Virtuemart product category called 'No Shipping' (the name is very important). This category does not need to be published (its best if its not). Add this category id to the category field in the plugin too – the field is a comma separated list of category ids.
5. Configuring PayPal and Manual Payments plugins (If installed)
In the PayPal IPN plugin you should set the default settings for the payment mode (sandbox or live) and the default PayPal account. These can be changed on an event specific basis, from the RSVP Pro template configuration options.
In the Manual payment plugin, you can customise the Payment Page layout and the payment confirmation message, both of which can also be configured on an event by event basis.
To configure either of these on an Event by Event basis select the + next to Payments Config within the Event Sessions Template(note this will only be shown once 'Has Fees' is set to yet), then there will be Tabs shown within the Payements Config.Clicking either tabs allows configuration of that particular plugin.
6. Create Your First Events to be Attended
Create the event as normal and complete the details on the attendance option tab – start by selecting 'yes' for 'Allow attendance registration”.

This will reveal various options: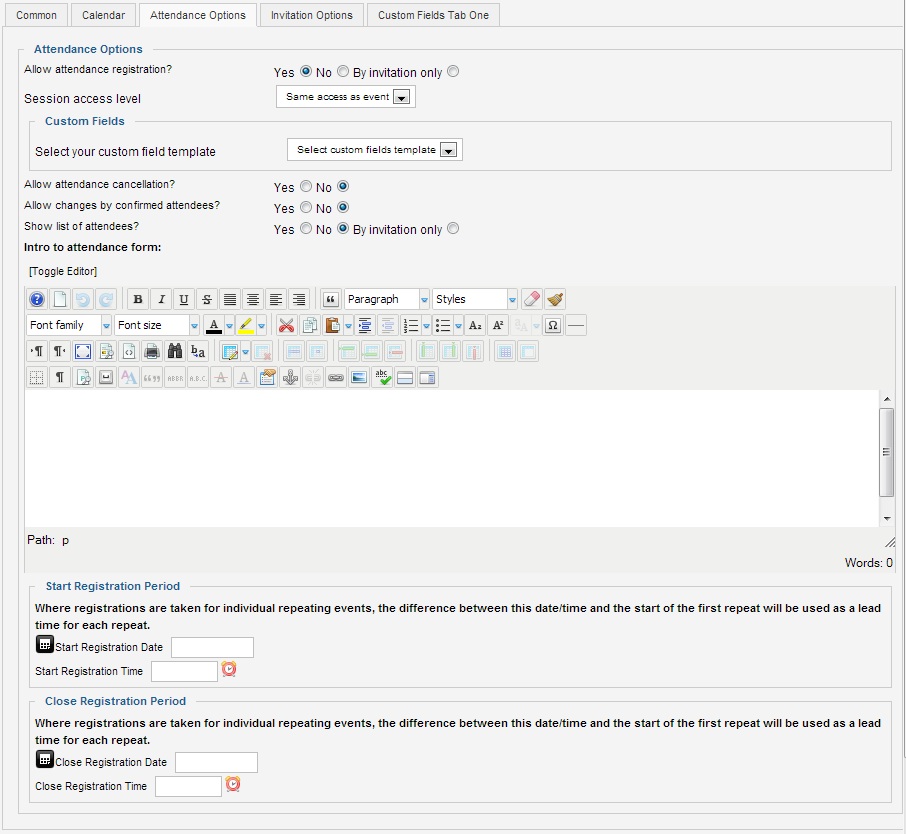
6.1. Extra Custom Fields
If you do not wish to have any custom fields then ignore the extra fields drop down and continue to create the attendance records as in the old version of RSVP Pro. This will not allow for any payments or custom fields.
If you require custom fields or payments then change this drop down to Blank/No Template. (Its possible to create templates for forms/custom fields that you use frequently – in which case you can select and customise one of these.).
At this point you should read the RSVP Pro template editing notes since there is no point repeating its content here.

Then click the 'Customise Template For This Event' link which opens up a form editing page.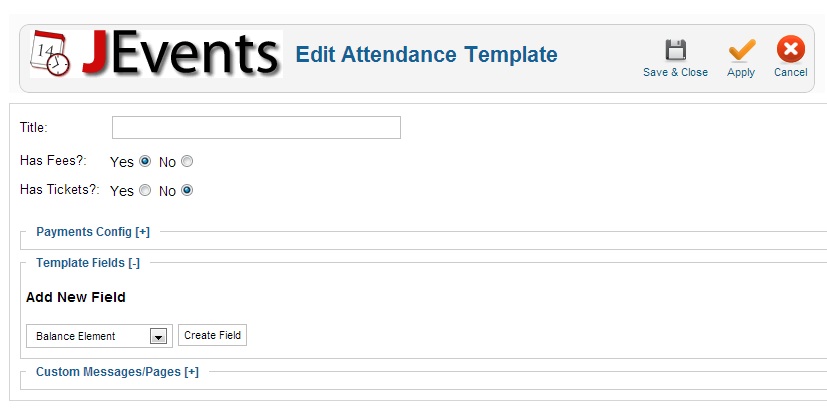
In here you can enter a title for the template (this is not displayed to the user but are useful to help you identify the field template at a later date). If you are customising a template you could change the title – if you do not the system will generate a unique suffix to add to the template name on which its based.
All customisations you make to the template here are unique to the event and any changed made afterwards to the underlying template WILL NOT change the version used in this event after you click save. To make changes to the actual template you will need to do this from the Template Manager.
6.2. Allow Cancellation
If this option is enabled then the visitor can cancel their attendance. Unless you allow changes (see next section) they will NOT be able to re-register for the same event.
6.3. Allow Changes
If this option is enabled the visitor can change the choices they have made for any custom fields and can change their mind about attendance.
6.4. Track Attendance
For repeating events you can record/track attendance for the event as a whole (i.e. all the repeats together e.g. for a series of concerts or lectures) or for each repeat separately.
6.5. Show List of Attendees
Attendee lists are always visible to the event creator or JEvents administrator users – this option controls if this list is visible to other users. You have the option of limiting this display to invitees only.
6.6. Intro to Attendance Form
This is the introductory text that appears at the top of the event registration part of the event detail page.
And is only shown when the registrations are open.
6.7. Start Registration Period
This is the date that registrations start.
Note that for repeating events the time different between this date and the first repeat is used to control registration for separate repeats. e.g. if registration starts 2 weeks before the first repeat then registration for each separate repeat starts 2 weeks before each specific repeat. So if you want to start all repeat registrations now you should set this start period in the past e.g. 2 years ago.
6.8. Close Registration Period
The date that registrations close – see point above for the treatment of repeating events.
6.9. Close Changes Time
The date that changes to registrations stop – this applies to cancellations and changes. See point above for the treatment of repeating events.
7. Sending Reminders
Reminders are sent via a crontab job in batches of emails based on the numbers you set in your RSVP Pro configuration.
If you want to run this using a cronjob on your unix based server then this is the entry in the cron file that I use in Joomla 1.7 (this runs the script every 10 minutes) :
*/10 * * * * /usr/bin/curl -s
http://www.mydomain.com/plugins/jevents/jevrsvppro/rsvppro/sendreminders.php > /dev/null 2>&1
or you could try
*/10 * * * * /usr/bin/wget -O /dev/null "http://www.mydomain.com/plugins/jevents/jevrsvppro/rsvppro/sendreminders.php" > /dev/null 2>&1
If you are using CPanel, you can use this command:
wget -q -O - http://www.mydomain.com/plugins/jevents/jevrsvppro/rsvppro/sendreminders.php >/dev/null 2>&1
and just define the time from the selected drop downs.
Note that for Joomla 1.5 you should use a different URL:
http://www.mydomain.com/plugins/jevents/rsvppro/sendreminders.php
You could also use an online service like Setcronjob to do this for you.
FAQ – Frequently Asked Questions
There is no Attendance tab when creating an event?
You need to enabled the RSVP Pro Plugin.
The registration form is not showing?
Please refer back to Chapter 2, section 3 of this document.
Users cannot select the time?
If using Joomla 1.5.x please make sure the Mootools Upgrade Plugin is enabled.